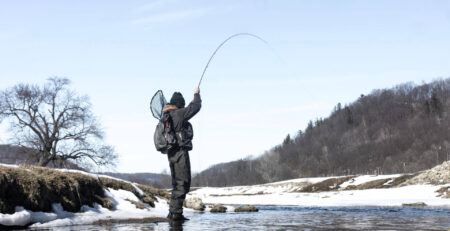
All About Fly Fishing Strike Indicators
Did you say indicator? Aren’t those just bobbers?
I remember starting out and wondering the same thing. The short answer is: well, kind of. While fly fishers often enjoy complexity, as a beginner, the jargon can be daunting. But don’t worry, you can call it a bobber and we can still go catch fish. However, there is some nuance to why we use specific “indicators” on a fly rod.
Indicator vs. Bobber: What’s the Difference?
Both tools allow you to visually detect what is happening below the surface. Generally, bobbers are used in still water to suspend a hook vertically. A bite usually results in the bobber bobbing straight down.
Indicators, however, are designed for moving water and built to be castable on a fly rod. They travel with the current at the same speed as your fly. It might move vertically, horizontally, pause, or twitch. You are looking for anything abnormal or a change in rhythm that signals your fly has hit a rock, a stick, or hopefully been grabbed by a fish!
(And for the sake of our sanity, I won’t even mention that center-pinners have bobbers called “floats.”)
The Drag-Free Drift
The goal of indicator fishing is creating a drag-free drift. A good starting point is setting your indicator 1.5 times the depth of the water.
If the water is 4 feet deep, set your indicator 6 feet above your fly. This provides enough slack for the fly to reach the bottom without the indicator pulling it unnaturally through the current.
When to Use an Indicator
Indicator nymphing, which involves suspending a weighted fly beneath a floating strike indicator, has some general advantages and disadvantages.
Advantages:
- Fishing deep holes.
- Maintaining a consistent drift.
- The ability to fish further across a stream. The pivot from where your indicator attaches allows a drag-free drift at further distances.
Disadvantages:
- If the distance from your indicator to your nymph is too great relative to the depth you are fishing and has too much slack, there will be a delay from when you see a “strike” from your indicator.
Indicators are helpful for any skill level of fisherman, but can be extremely helpful for beginners. Indicators provide clear visual cues to what is going on under the water and require less “feel” than other techniques. To each their own, each style of fishing has benefits and it’s up to you to determine the one that is right for you or the situation.
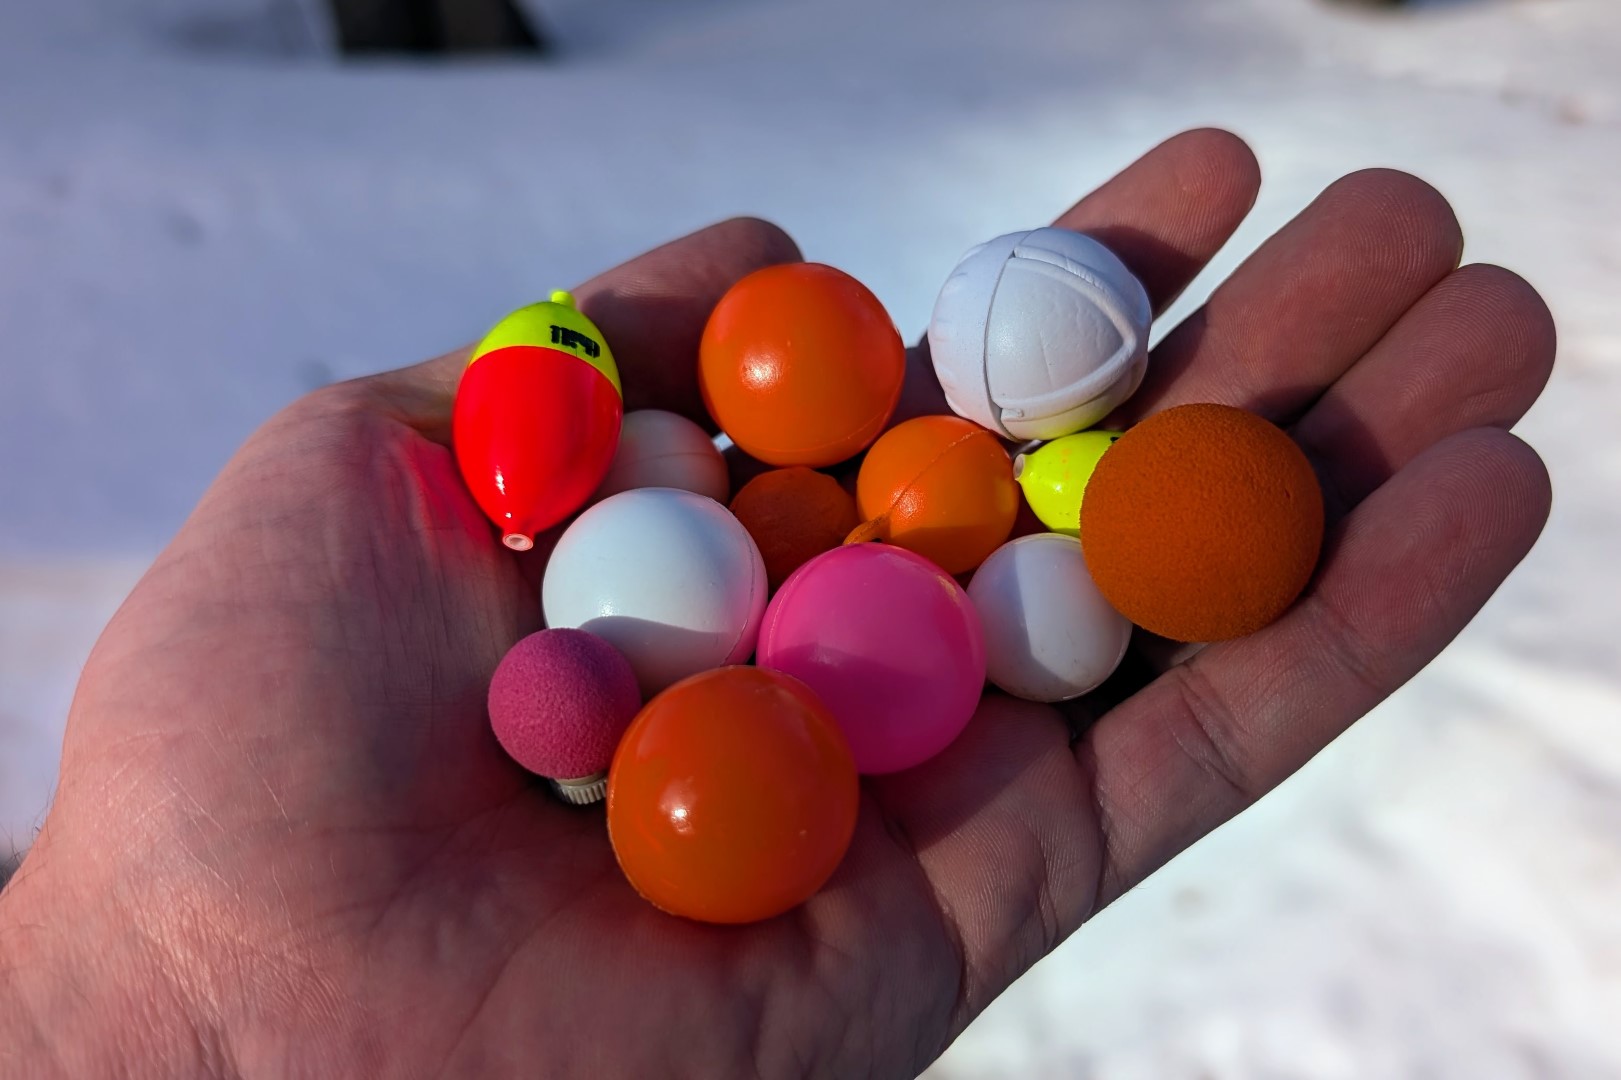
Types of Indicators
Stick on Indicators
This style of small foam indicator that gets pinched onto your leader can be a great option for castability; they are small enough to not catch the wind and light enough to land gently on the water. They can be difficult to adjust and are often found in only a few small sizes. They work in a pinch (pun intended), but I would skip these style of indicators if you can find other options.
Yarn/Wool Indicators
If you are targeting spooky fish in clear water, yarn or wool (New Zealand strike indicator) can be a great option. They land on the water softly and are incredibly sensitive. They do require floatant to keep their buoyancy and can only suspend light and medium weighted nymphs. They can be somewhat difficult to cast on windy days.
Thing-a-ma-bobbers
I’m grouping all plastic or foam indicators in this section. “Thing-a-ma-bobbers” are a specific brand of indicator that solved the problem of suspending large flies. They used a grommet that you would loop your leader through and wrap around to keep the indicator’s position. They worked well but still had downsides of kinking your leader and being difficult to adjust.
Today, though, there are many better options including Airflo’s Air-Lok or Center-Lok or Oros indicators. The transition has moved from plastic to biodegradable foam, and there has also been a move from attaching your leader to the side of the indicator to attaching your leader through the middle of the indicator. These center-locking foam indicators are my personal favorite for most applications. They are extremely buoyant, easy to adjust depth, and they come in multiple sizes for different depths/weight. The biggest downside is that they can be splashy and have the potential to spook fish in certain situations.
Floats
I said I wasn’t going to get into it, but here we are. Floats are generally used by center-pin anglers and are a heavier style of bobber designed to track straight in heavy current while pulling line off the reel. Some floats can be used as indicators (Thill Ice-n-Fly, Blackbird, etc) that are light enough to cast with a fly rod and because they have a “top-side” to them, they will sit vertically when your fly comes under tension. This can be a great technique for deep slow pools when fishing for larger migratory fish. The slender profile of these indicators provide much more sensitivity and allow you to tell when your flies have taken the slack out of your leader and can show if your flies are dragging on the bottom.
Hopper/Dropper
If regulations allow more than one fly, a hopper/dropper rig is a great option. The hopper acts as your indicator and also has the advantage of giving you two flies for fish to target. This is a great option if you are figuring out whether the fish are targeting dry flies or nymphs. The biggest downside is adaptability. It can be difficult to change the depth or weight of your bottom fly quickly. This method is great when fishing fairly shallow (less than 3 feet) uniform depths and the conditions align for fish to eat both dry flies and subsurface flies.
Sighter Material
The other major difference between a bobber and an indicator is that an indicator doesn’t have to be a suspension device. When euro nymphing, sighters are often used as your strike indicator. Sighters are a brightly colored (often multi-colored) section of your leader that will indicate the movement of your fly by straightening out or twitching. This is a great option to give you maximum sensitivity, but can limit the distance of your drifts and require specialized leader setups.
Different Indicators for Different Situations
For steelhead fishing, my go-to indicators are either an Oros or an Air-Lock in the 3/4-inch or 1-inch size depending on water flows and clarity. For trout fishing when I’m trying to fish a deep pool, I’ll often reach for a 1/4-inch or smaller. You will want the smallest indicator you can get away with to get the most sensitivity. If you are having a hard time seeing your indicator or you keep moving your indicator when mending, you may want to go to a larger size.
Color Choice
This is completely a personal preference. I tend to prefer bright orange or pink indicators in a solid color. The two-toned indicators tend to mess with my eyes when I don’t know which color to focus on. I was never much of a fan of the white indicators; they were harder to see, especially if there was foam on the water. If you have heard the phrase “wood is good, but foam is home,” you know you are in a spot that fish like to hold.
The purpose of an indicator is to visually detect a strike, which is more difficult if your indicator blends in too much with the surrounding foam. I am not under the belief that colored indicators spook fish more than natural colored ones in most situations. The white indicators do have their advantages, though. When fishing at dusk and dawn, the white indicators stay visible much longer than other colors.
Avoid the “Splash”
Indicators can get a bad reputation for being “splashy” or “noisy”. You can reduce the amount of noise and splash from your indicator by slowly lifting your rod until your indicator lifts off of the surface before you begin your next cast. Many of you may already practice this technique when fishing dry flies.
“Checking” Your Indicator
Cast your indicator upstream to gain depth. When you release tension from your indicator, your fly will drop quickly to the bottom. If you are fishing a deep drop-off, it will take some time for your fly or flies to reach the bottom. You can also hold your indicator back in the current to get your flies to swing under and downstream, which can be beneficial in some situations.
Adjust Often
To really dial in your indicator fishing, you should adjust often to get that perfect “drag-free drift”. The benefit of the new screw-on indicators is that they make it very easy to move your indicator up or down. Sometimes the difference between getting your fly in front of a fish or not can be moving your indicator up or down just a few inches.